Table of Contents
I have been composting with worms for years, and I have to tell you, setting up an outdoor worm bin was one of the best things I ever did for my garden. When I first started, I did not know much. I made a lot of mistakes. But now I want to share everything I have learned so you can get it right from the very start.
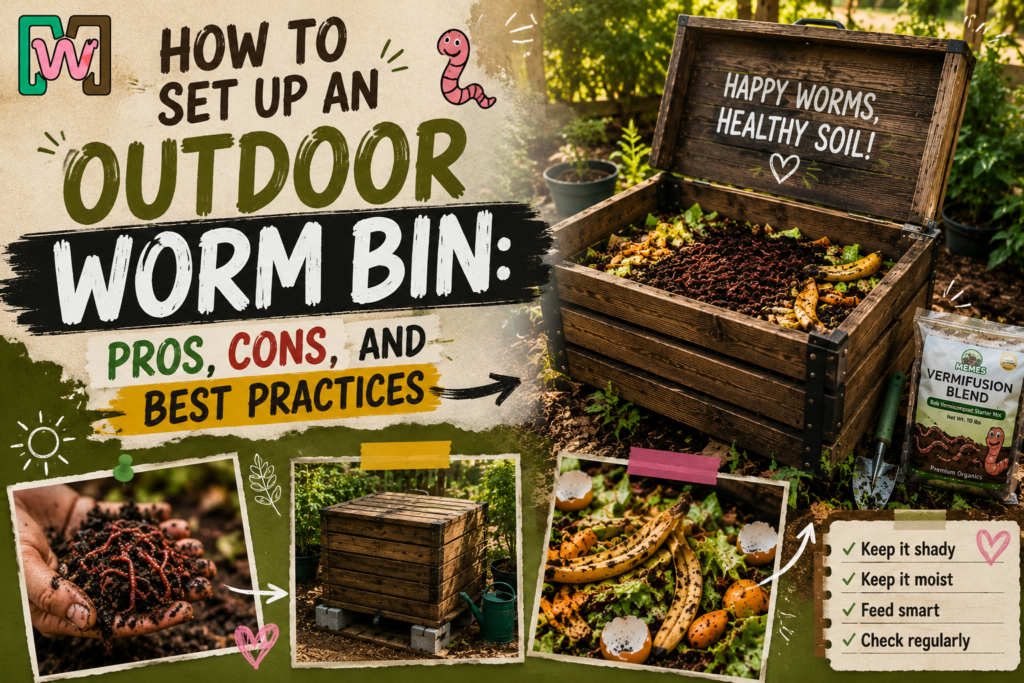
If you are thinking about starting your own outdoor worm bin, you are in the right place. In this guide, I am going to walk you through exactly how to do it, what is good about it, what is not so great, and the best tips I know to make your worm bin work really well.
What Is a Worm Bin?
A worm bin is a container where worms live and eat your food scraps and other organic waste. The worms break down the waste and turn it into something called vermicompost, or worm castings. This is one of the most powerful natural fertilizers you can use in your garden.
You can keep a worm bin inside or outside. An outdoor worm bin is bigger, holds more waste, and is great for people who have a yard or garden space. According to the United States Environmental Protection Agency (EPA), food scraps and yard waste make up more than 28 percent of what we throw away. Composting, including vermicomposting, is one of the best ways to keep that waste out of landfills and put it to good use.
Why I Chose an Outdoor Worm Bin
I started with a small indoor bin, but once my garden grew, I needed something bigger. Moving outside gave me so much more room to work with. I could add more scraps, raise more worms, and make a lot more compost.
Here at Memes Worms, we always say that your worm bin is only as good as the care you put into it. And I fully believe that. When I set up my outdoor bin the right way, my worms thrived, my garden loved it, and I stopped sending so much stuff to the landfill.
Pros of an Outdoor Worm Bin
1. More Space
An outdoor worm bin can be much bigger than an indoor one. That means you can compost more food scraps, cardboard, and yard waste all at once. More space also means your worms can spread out and work faster.
2. Great for Larger Households
If you cook a lot or have a big family, you probably make a lot of food waste. An outdoor worm bin can handle that. I never have to worry about filling it up too fast.
3. No Smell Inside Your Home
Some people worry that a worm bin will smell bad. When it is outside, that is not a problem at all. A healthy, well-managed worm bin should not smell bad in the first place, but outdoors, there is plenty of fresh air to keep things fresh.
4.Free Fertilizer for Your Garden
The worm castings that come out of your bin are like gold for plants. Research from Cornell University shows that vermicompost can improve soil structure, water retention, and plant growth significantly better than regular compost alone. I use mine on my vegetable beds, flower pots, and even my lawn.
5.Helps the Environment
Every time I fill my worm bin instead of the trash can, I feel good about helping the planet. Worms do a real job. They reduce methane gas that would come from food rotting in landfills.
Cons of an Outdoor Worm Bin:
1. Temperature Changes Can Be a Problem
Worms like temperatures between 55 and 77 degrees Fahrenheit. When it gets too hot or too cold outside, your worms can get stressed or even die. I learned this the hard way one summer when I did not move my bin into the shade in time.
2. Pests Can Be an Issue
Outdoors, you might deal with ants, flies, or even larger animals like raccoons trying to get into your bin. A good lid and proper bin management go a long way in preventing this.
3.You Have to Check on It More Often
Weather changes mean you need to pay more attention to moisture levels and temperature in your outdoor bin. It takes a little more work than an indoor bin in a climate-controlled space.
4.Not Ideal for Very Cold or Very Hot Climates
If you live somewhere with very harsh winters or very hot summers, you will need to plan ahead. You may need to insulate your bin or move it to a shaded or sheltered spot during extreme weather.
What You Need to Get Started?
Before I set up my outdoor worm bin, I gathered everything I needed. Here is what you will want to have on hand:
The Bin: You can buy a ready-made worm bin or make your own from a large plastic storage container or wood. A bin that holds at least 8 to 10 gallons works well for most households. At Memes Worms, we carry ready-to-use outdoor worm bins that are already drilled with drainage holes and ventilation to make setup easy.
Bedding: Worms need a soft, moist home to live in. I use a mix of shredded newspaper, cardboard, and coconut coir. Wet the bedding until it feels like a wrung-out sponge, not dripping wet.
The Worms: Not just any worm will do. You want red wigglers, also known by their scientific name Eisenia fetida. These are the best composting worms because they eat a lot, reproduce fast, and stay near the surface where the food is. At Mimi’s Worms, our Red Wiggler Starter Pack comes with 1 pound of healthy, active worms ready to get to work.
Food Scraps: Start with fruit and vegetable scraps, coffee grounds, tea bags, and crushed eggshells. Avoid meat, dairy, oily foods, and anything salty or spicy. Those things can harm your worms and attract pests.
A Spray Bottle: For keeping moisture levels right.
A Lid: To keep pests out and moisture in.
Step-by-Step: How to Set Up Your Outdoor Worm Bin:
Step 1: Choose the Right Spot
Pick a spot that is shaded from direct afternoon sun. Under a tree, next to a fence, or on a covered porch are all good options. The spot should have good drainage so rain does not flood your bin.
Step 2: Drill Holes If Needed
If your bin does not already have drainage holes in the bottom and ventilation holes on the sides or lid, drill them now. Worms need air to breathe and water to drain so the bin does not get waterlogged.
Step 3: Add Your Bedding
Fill the bin about halfway with moist bedding. I use shredded newspaper mixed with a little coconut coir. The moisture level should feel like a damp sponge.
Step 4: Add the Worms
Gently place your red wigglers on top of the bedding. They will burrow down on their own. Do not bury them right away. Let them move in naturally.
Step 5: Add Your First Food Scraps
Bury a small amount of food scraps in one corner of the bin, a few inches under the bedding. Start small. New worms take a little time to get settled and start eating well. I usually start with a cup or two of scraps for the first week.
Step 6: Put on the Lid
Close your bin and let your worms settle in for a few days before you check on them again.
Best Practices for Outdoor Worm Bin Success:
1. Keep the Moisture Right:
Your bin should never be dry or soaking wet. I check mine every few days by feeling the bedding. If it is too dry, I mist it with water. If it is too wet, I add dry shredded cardboard.
2. Feed in Rotation:
Instead of adding scraps to the same spot every time, rotate around the bin. This gives worms time to finish one area before you add more. It also helps prevent odors.
3. Add Carbon-Rich Materials:
Every time I add food scraps, I also add a handful of shredded paper or cardboard. This keeps the smell down and gives the worms good bedding material to work through. A good balance of green, nitrogen-rich scraps and brown, carbon-rich materials keeps everything running smoothly.
4. Protect from Extreme Temperatures:
In summer, move the bin to the shade or wrap it with burlap to keep it cool. In winter, I move my bin to a sheltered area like a garage, shed, or covered porch, and I add extra bedding to help insulate it. The University of California Agriculture and Natural Resources notes that worm activity slows significantly below 50 degrees Fahrenheit and can stop completely at freezing temperatures.
5. Harvest Worm Castings Every Few Months:
When one side of your bin looks dark, rich, and earthy with very few food scraps left, your compost is ready. I move the finished compost to one side, add fresh bedding and food to the other side, and let the worms migrate over. After a few weeks, I scoop out the finished castings and use them in my garden.
Recommended Products from Memes Worms
If you are ready to get started, here are the products I use and recommend from Mimi’s Worms:
Red Wiggler Starter Pack (1 lb): The best composting worms, healthy and ready to work. Perfect for starting a new outdoor worm bin.
Outdoor Worm Bin Kit: Comes with the bin, bedding starter, and a feeding guide. Saves you the trouble of drilling holes yourself.
Coconut Coir Bedding Blocks: My favorite bedding material. Expands with water, holds moisture well, and worms love it.
Worm Castings (Finished Vermicompost): If you want to start using compost right away while your bin gets going, our ready-made worm castings are available in several sizes.
Worm Bin Thermometer: A small tool that helps me keep an eye on the temperature inside the bin, especially during hot summers and cold winters.
Final Thoughts
Setting up an outdoor worm bin is one of the most rewarding things I have done as a gardener. Yes, it takes some learning at first, but once you get the hang of it, it is easy and incredibly satisfying. I love knowing that my food scraps are turning into something my garden really loves.
If you are ready to start, Mimis Worms has everything you need to get going. From starter worms to full bin kits, we make it simple for anyone to begin vermicomposting right in their own backyard. You can browse more guides on our blog.
Give it a try. Your garden will thank you.
Pure Red Wiggler Composting Worms For Sale
Transform your food scraps and yard waste into rich, organic compost with Red Wiggler Composting Worms – Eisenia Andrei for Vermicomposting, Soil Health, and Organic Gardening. ALSO KNOWN AS CALIFORNIA RED Composting WORMS. These hardworking worms are nature’s composters, ideal for converting organic matter into nutrient-dense worm castings (also known as black gold). Perfect for home composters, gardeners, educators, and eco-conscious households.
Living Material + Red Wiggler Composting Worms Eisenia andrei
What to expect when buying Red Wigglers in Living Material: You’ll receive a 10×8×6 box containing a balanced composting blend of Eisenia andrei composting worms, nutrient-rich castings, and naturally active material (including cocoons and beneficial microbes).
Pure Red Wigglers Worm Cocoons - Composting Worms Eisenia Fetida
Our Worm Cocoons (Eisenia fetida) are a simple, reliable, and eco-friendly way to start or expand your composting setup. Each order includes cocoons embedded in rich, biologically active material to preserve freshness and composting potential during transport.
People Also Ask:
Q1. How many worms do I need to start an outdoor worm bin?
I started with 1 pound of red wigglers, which is about 1,000 worms. That is a great amount for a beginner. As long as you feed them regularly and the conditions are right, they will double their population every 60 to 90 days. You do not need to add more worms after the first setup unless something goes wrong.
Q2. What can I not put in my outdoor worm bin?
Do not add meat, fish, dairy, oily foods, citrus peels in large amounts, onions, garlic, or anything very salty or spicy. These things can harm your worms, attract pests, and create bad smells. Stick to fruit and vegetable scraps, coffee grounds, tea bags, and plain paper products.
Q3. How do I keep ants out of my outdoor worm bin?
Ants are usually a sign that the bin is too dry or there is uneaten food sitting on top. I make sure to bury all food scraps under the bedding, keep the moisture level right, and place the bin legs in trays of water if the ant problem is serious. A thin layer of cinnamon around the outside of the bin can also help.
Q4. How long does it take to get usable compost from a worm bin?
In good conditions, you can start harvesting worm castings in about two to three months. The speed depends on how many worms you have, how often you feed them, and how warm the bin stays. Warmer temperatures and regular feeding speed things up.
Q5. Can I leave my outdoor worm bin alone for a week or two?
Yes, worms are pretty low-maintenance. I have left mine for up to two weeks without any issues. Before I go away, I make sure the moisture level is right, the bin is in the shade, and there is enough food buried inside. I add a little extra food and fresh bedding before I leave, and my worms are always fine when I get back.

Samantha Flowers
Hi, I’m Samantha aka Meme, founder of Meme’s Worms, a commercial worm farm based in Valdosta, Georgia. I’m a hands-on worm farmer, educator, and business owner who has spent years raising, harvesting, and shipping Red Wigglers, European Nightcrawlers, and composting worms to gardeners, homesteaders, educators, and commercial growers across the United States. Everything I teach and write about here is based on real-world experience, not theory. View More